*All supplies SHOULD be available at most craft stores.
|
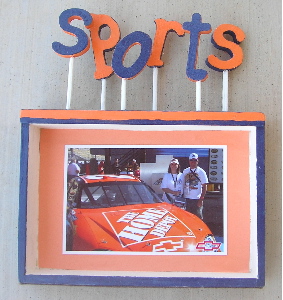
This is a 'Nascar: Tony Stewart' thing, but using an open shadow box like this, you could paint it colors to match E! or any fire dept.(or stain it) and spell out Emergency! or E! across the top, with one picture or more from Emergency! inside. |
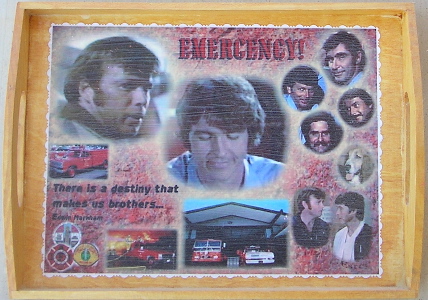
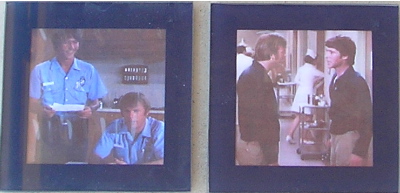
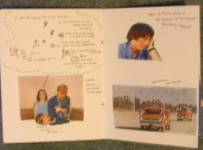
Paint or stain a plain wooden tray. I used one of the Poster Pics by Sheryl off my site for the photo and scissors that cut designs for the edging. It's modge podged on, but there's a neater way, as this one leaves streaks. See the next idea. :o) |
|
Same as the other tray, but I just glued the corners of the design in and my husband is going to cut a sheet of Plexiglas to go over the inside picture. |
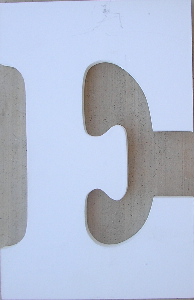
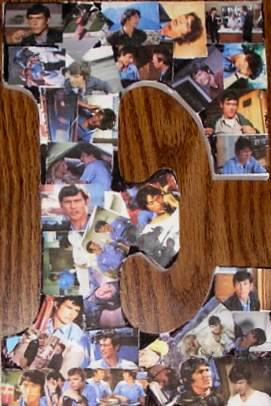
This is a new one I thought of. This is a large letter 'E' that can hang on the wall. Make a collage of E! pictures on it. You can buy these letters in various sizes, maybe you'll want to spell out the whole title: 'Emergency!' |
|
Have you seen the coaster sets where you can insert your own photos? I made a set of four using E! photos. |
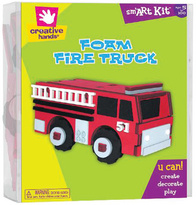
You can buy this kit at Wal-Mart for $5. Check your local store in the craft section. I found it online, too: http://www.hancockfabrics.com/3-D-Foam-Kit---Fire-Truck-Craft-Supplies_stcVVproductId127727829VVcatId540006VVviewprod.htm
|
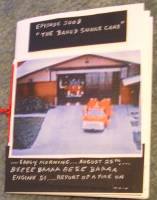
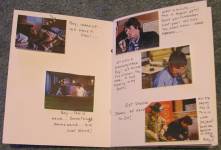
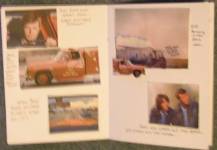
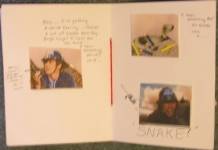
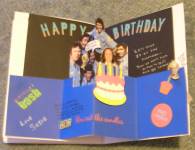
Make a greeting card using still shots from the show.
My sister did this one for me this year, another one last year and they are
great fun to receive. I laughed so hard, I had tears. You can give a friend
or relative their own little birthday (or holiday) episode.
|
|
|
|
|
|
Make your own E! clock. I got this photo frame one for Christmas, specifically for this, thanks to my husband! :o) I need to adjust a couple of pictures, but wanted to share the idea. |
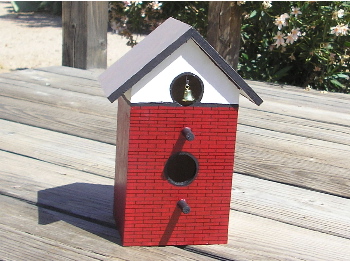
Make a Bird-E! house. This is still in progress, as bricks need to be drawn on the other three sides and I intend to add a few E! pics on back (for the rear door) and on the front near the bottom, just of the guys. Thanks to my husband for taking on the 'brick' task! :o) This won't be an outside house for our birds. The weather here just does this kind of stuff in. It's strictly for in the house, just to have. :o) Anyway, wanted to share the idea with you in case you are interested in making one. |
|
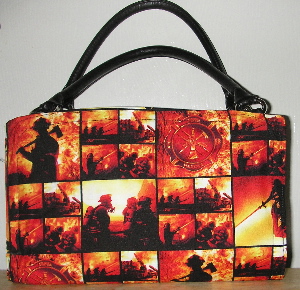
Make your own purse cover! My sister made this for me for my Miche purse. Sews the material like a pillow case type deal, just big enough to fit over a cereal box that has been cut open to lay flat. Then she inserts the cardboard and sews up the open end. We hold them on the purse with Velcro dots. |
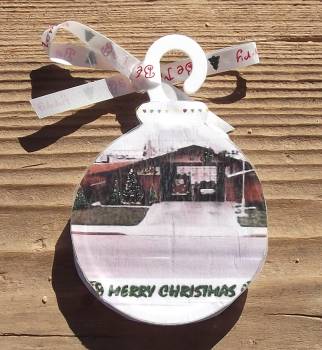
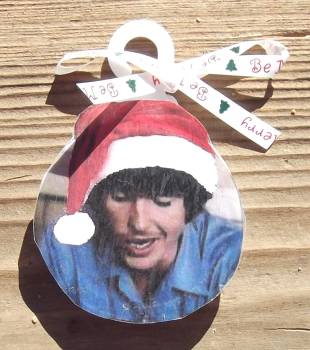
Make your own E! ornament. I used a plastic balloon weight, made a couple of E! pictures Christmassy, and then after laminating them, glued them onto each side of the weight.
|
|
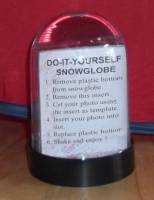
Make your own E! snowglobe. I did this last year for two friends. Same as with the ornament, you can make some E! pics Christmassy or just winterize them if you want. I did both. These snowglobes and others can be found in craft stores and other stores as well. I got this one at Wal-Mart. |
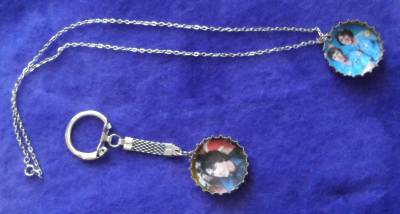
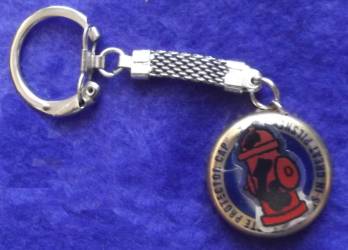
Make your own E! bottle cap jewelry or keychain, or whatever else comes to mind. Maybe a magnet, if you stick one on the back of the cap. :o) I used beer bottle caps for the items pictured. You just have to drill a very small hole in the lid near where the base meets the side. |
|
Make a dishtowel angel. Click on the picture to go to a site with excellent directions. It's not E!, but it's crafty! lol I would say if you can make a pot holder out of some fire fighter material, then find a red or black dish towel and a red or black dish rag (make the body one, the arms the other), then you could E! this somewhat, huh? We saw some of these 'angels' in a shop during the summer and they are very nice, easy to make. :o) |
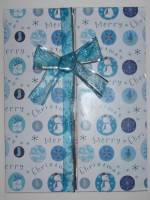
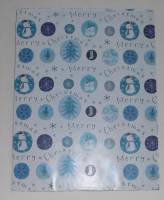
A little late on sharing this idea, sorry but it took me till yesterday to get this one completed. Anyway, I took a small project display board (about 15 inches high) and used wrapping paper to cover the outside to give it a present look. It's best if you put the paper on by panels and not one big piece. It'll tear the latter way. Anyway, dress it up with a ribbon and/or bow. I used tissue paper to line the inside on this one, crafty paper on another. Obviously, I didn't E! this one, but I sure can think of ways to do one with the E! theme. :o) Anyway, just wanted to share the idea in case. :o) |
|
|
|
|
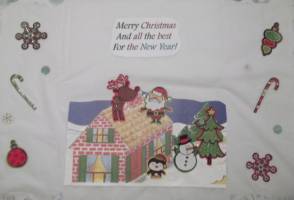
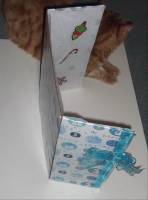
An idea for a card. I undid an envelope, then traced around it in a larger image on a piece of cardstock. Cut it out, covered the backside with wrapping paper. Inside is just regular scrapbooking paper and Christmas stickers. As you can see once it's open, it can stand up for a scene. Of course, the idea is to present it as a closed envelope, then the recipient opens it all the way up to see the greeting inside. :o) So far the ones I've done have been secured closed with velcro. If you make this and want to mail it, you'd probably need to put it in a padded envelope. |
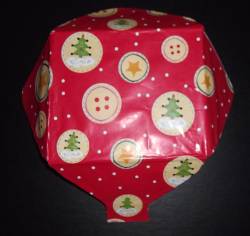
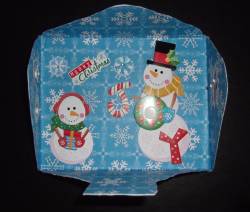
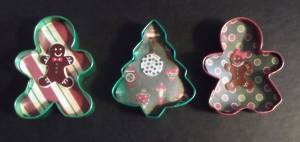
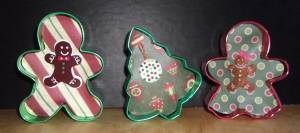
An idea for giving cookie cutters or a cookie cutter. Trace around the cutter onto cardstock or sturdy paper. The paper image will be slightly larger than the inside of the cutter. Place it inside, it'll stay put but can easily be removed. Add what ever you want for a touch of design. I used Wilton colored metal cutters available on Amazon.com. As you can see, some stand up easily on their own.
|
|
New! 12/07/15
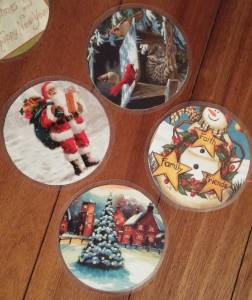
An idea for adding a little extra Christmas to the coffee table. I took old Christmas cards and cut out parts. Then laminated them for coasters. :o) You could always Christmas some E! photos and laminate them as well. :o)
|
New! 12/07/15
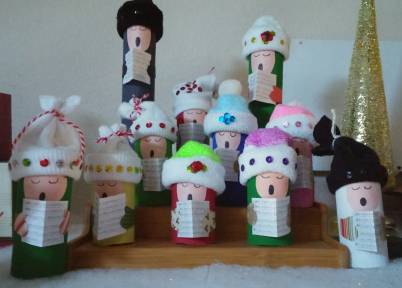
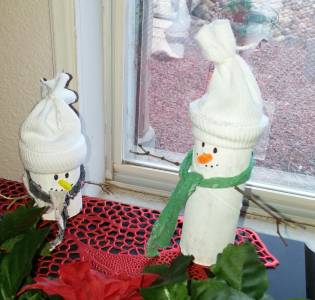
The carolers were made from toilet paper rolls. Just paint them, cut out faces from paper and glue them on. Cut paper mittens, glue on, then print out sheet music and attach it to the gloved hands. The hats are made from children's socks. :o) Another take on it would be to make six carolers and put on faces resembling the E! crew for a firehouse Christmas. The snowmen, of course, are made the same way, except I opted for stick arms instead of mittens.
|